I find navigating around the Stripe documenation a very frustrating experience. The series of screenshots below shows the journey, one page at a time, from the Home or Dashboard page of Stripe to the documentation for implementing a Client Only integration of Stipe Checkout Payments on your website.
It is inevitable that Stripe will tinker around with their documentation (and probably make it even more confusing). So, if the precise sequence of clicks shown in the screenshots below fail, you would probably be best to use the URLs and some of the key words to search google.
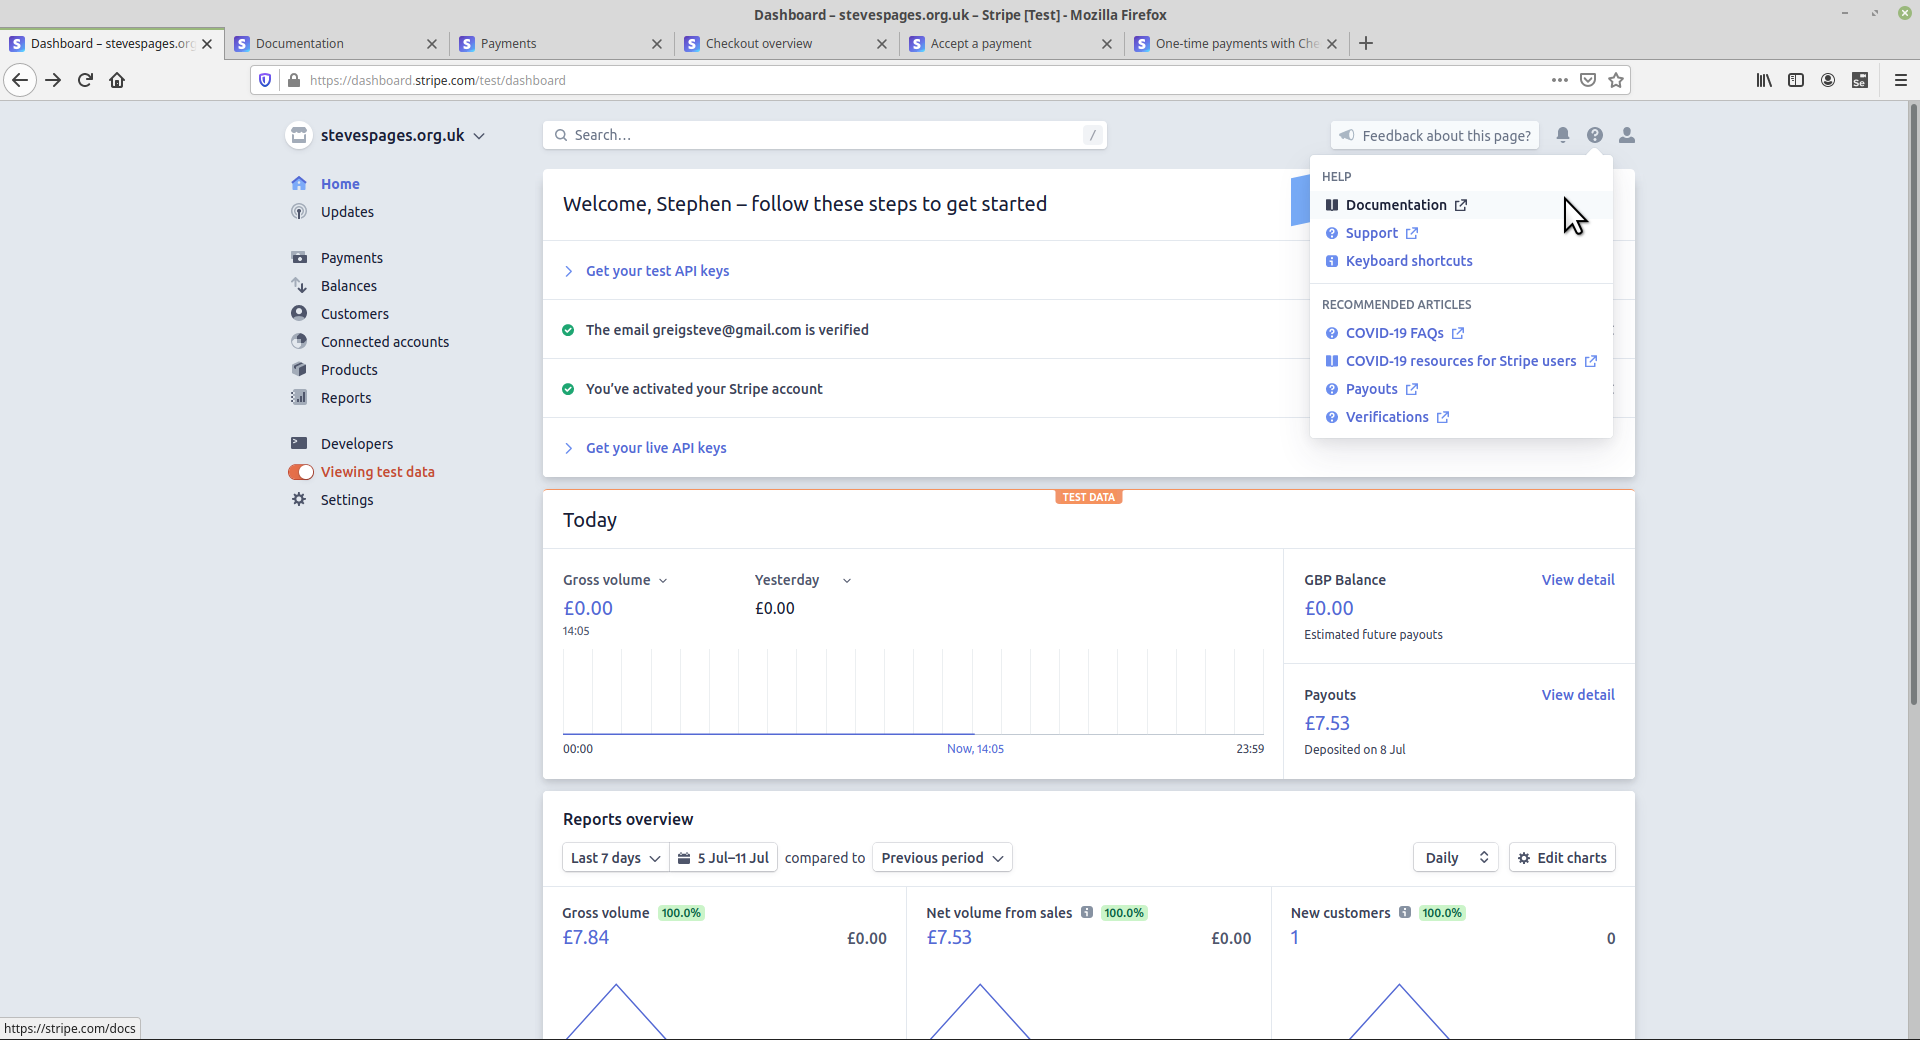
The Stripe Dashboard (https://dashboard.stripe.com/test/dashboard). Click on the question mark and then Documentation in the dropdown list.
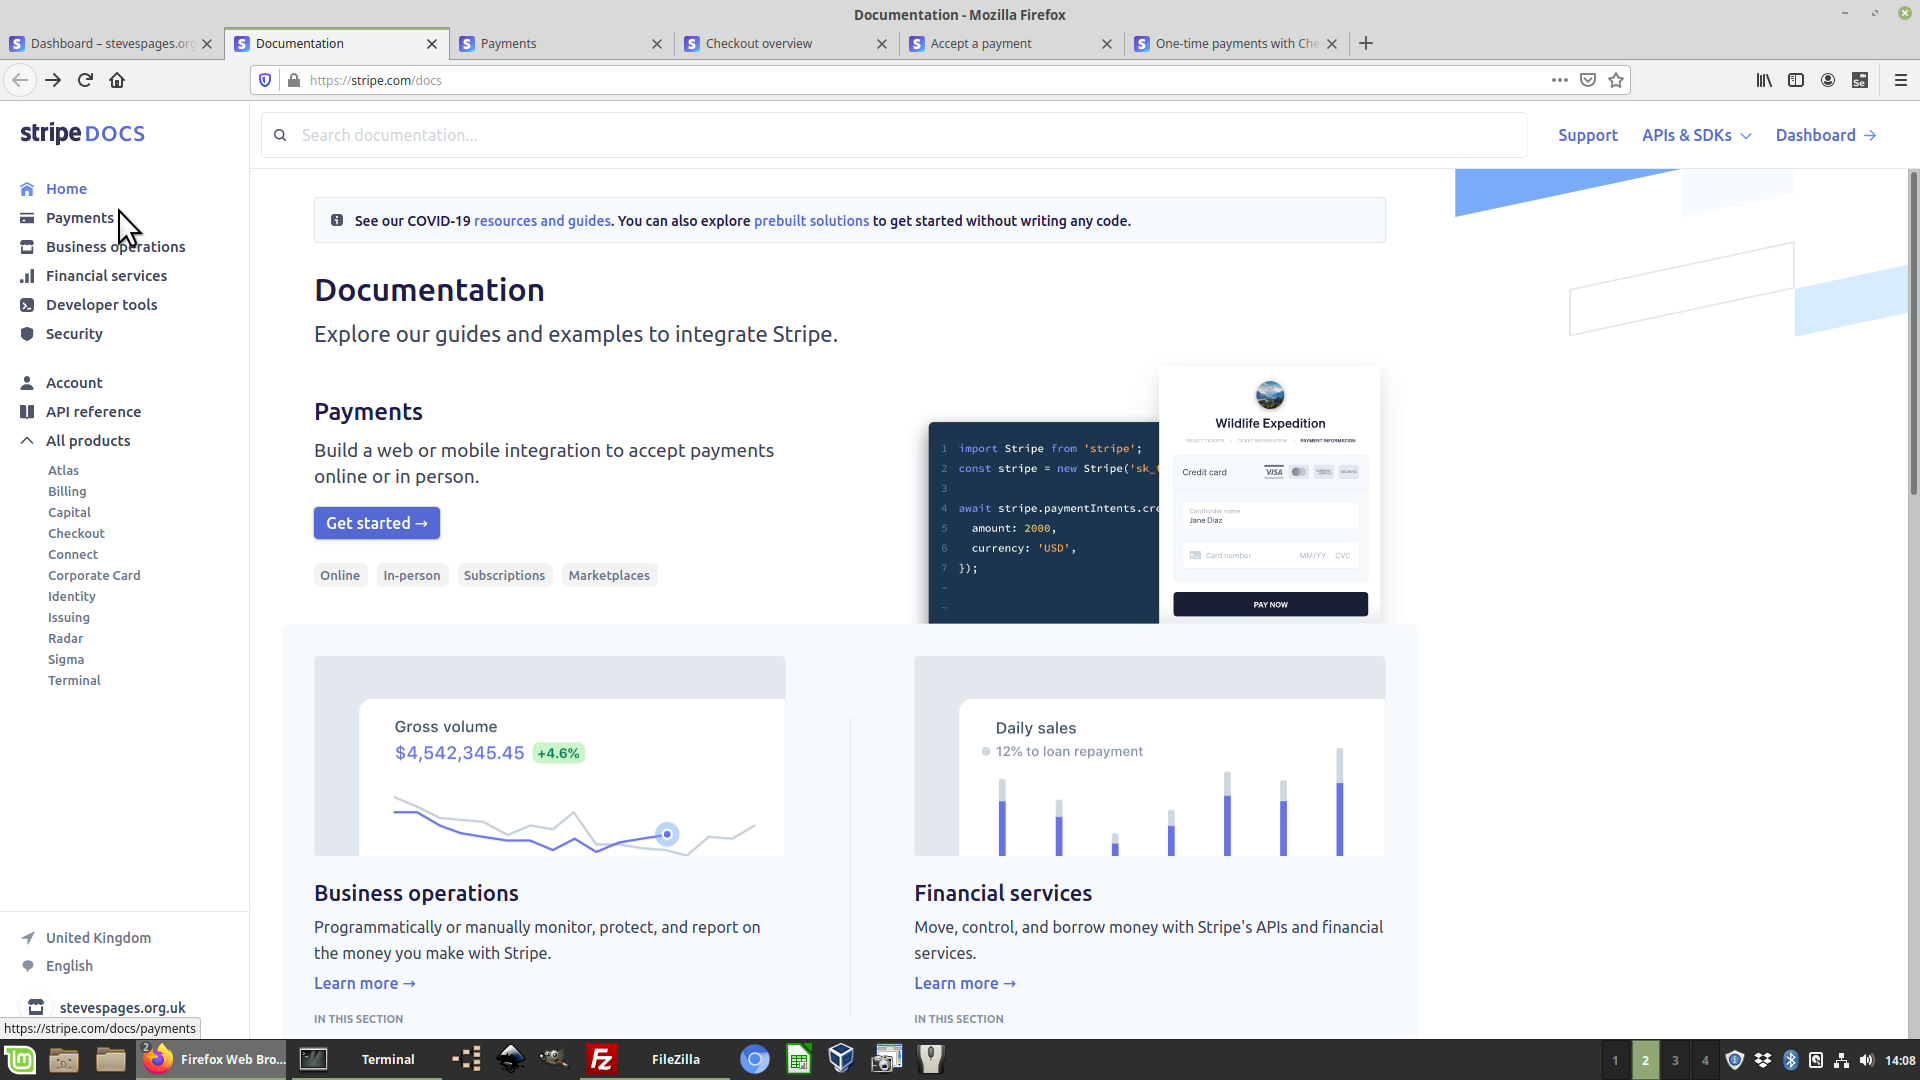
On the documentation page (https://stripe.com/docs) click on Payments in the lefthand navigation side bar.
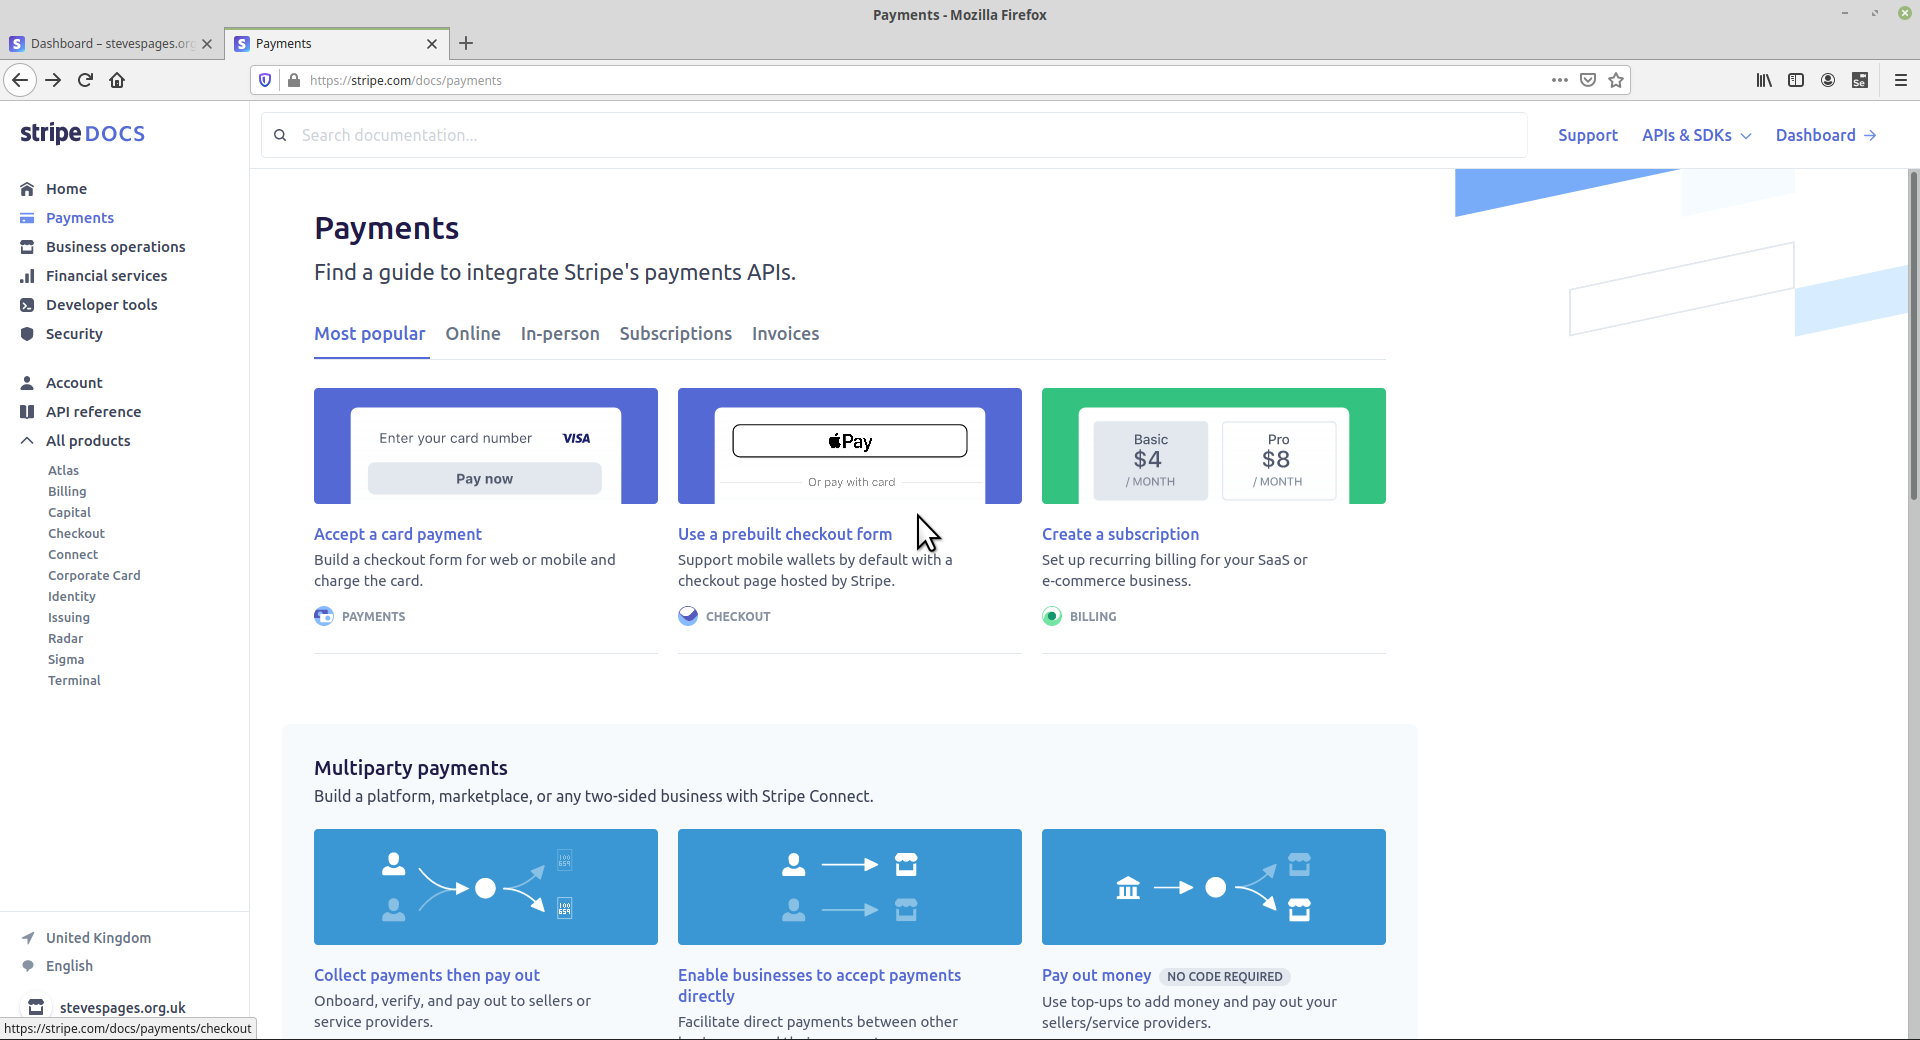
On the payments page of the documentation (https://stripe.com/docs/payments) scroll down and, in the Clone a sample project section, click on Accept a payment.
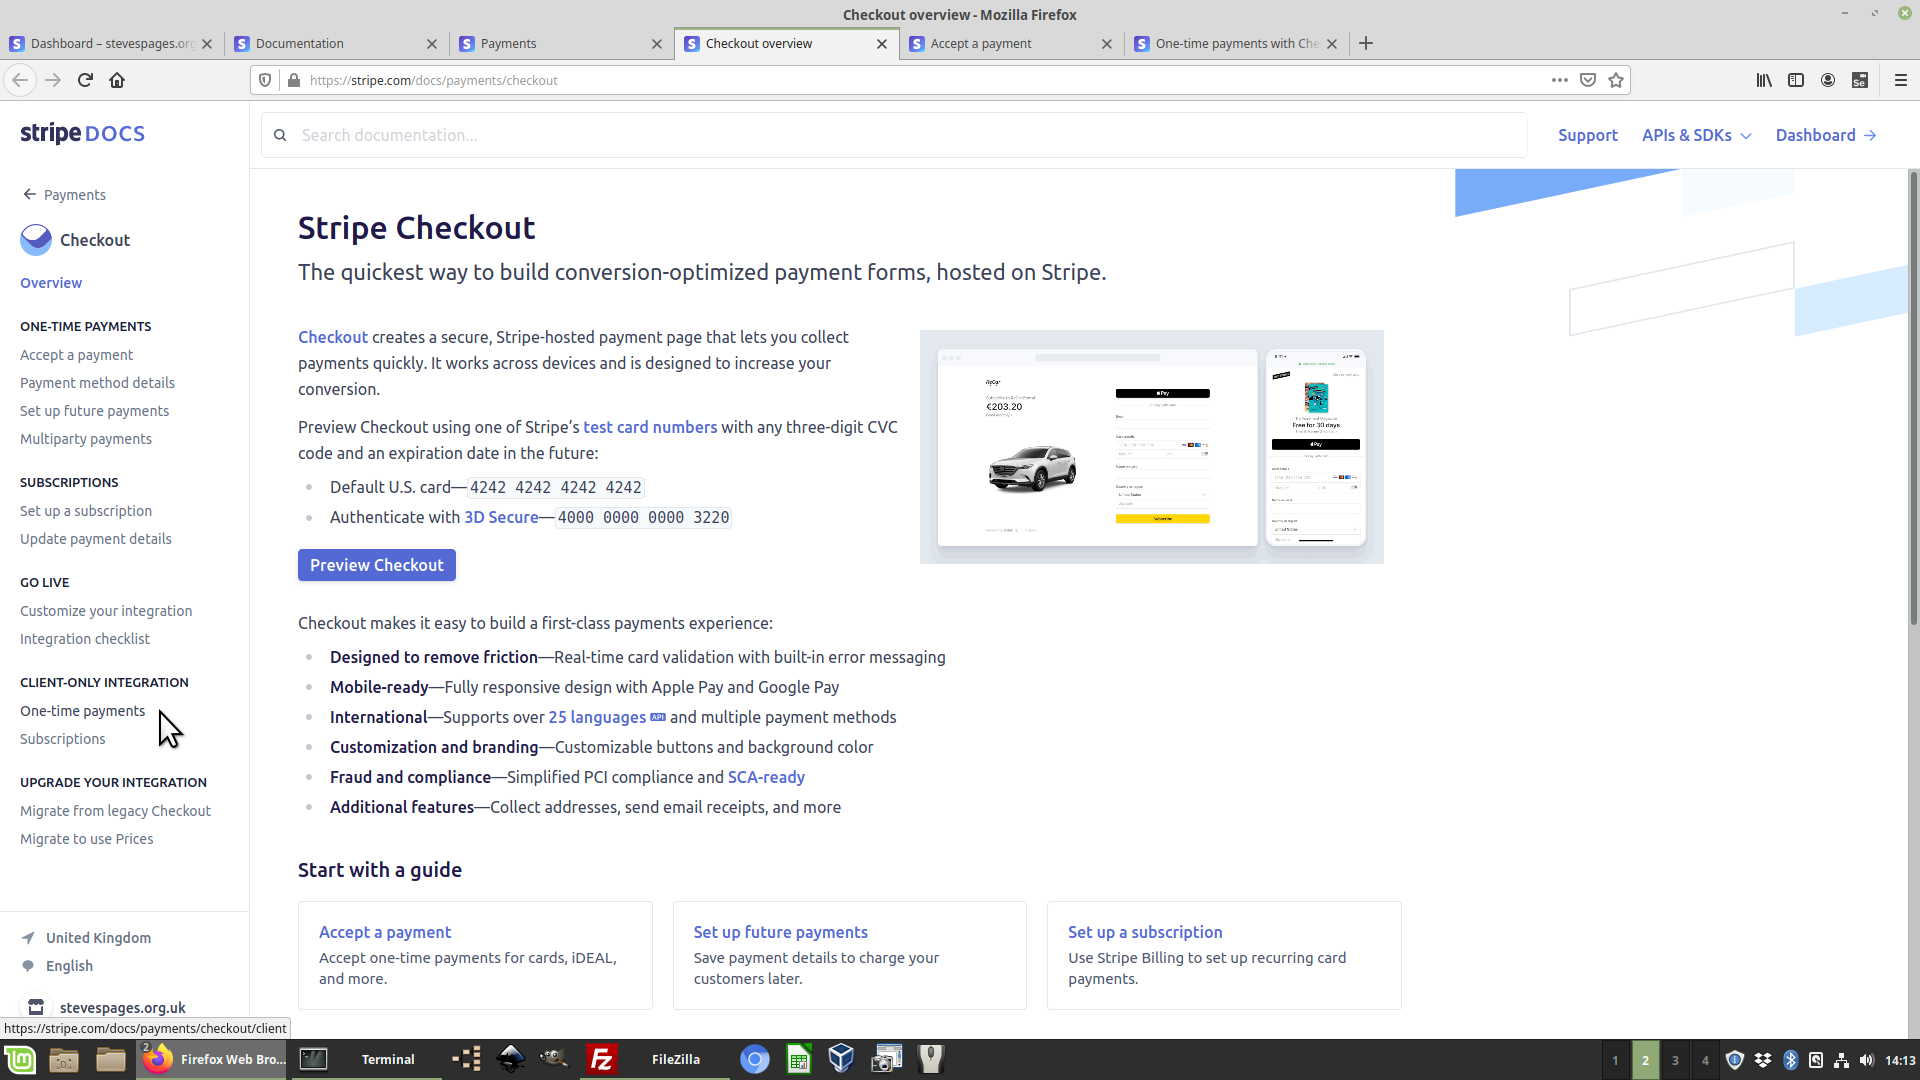
On the Stripe Checkout page (https://stripe.com/docs/payments/checkout) click on One-time payments in the Client-Only Integration section of the left hand side bar navigation.
Finally you have arrived at One-time payments with Checkout (https://stripe.com/docs/payments/checkout/client). This is where the instructions are!